A Modern Tool for the Traditional Pottery Artist
Brief: Sophomore studio project designing for a given persona
Persona: Professional Pottery Artist
Time Frame: 4 weeks (Additional development ongoing)
Product: Laser guidance tool for measuring clay on the potter’s wheel

Developing a Persona
My research began with trying to understand pottery and the creators of it.
What is the history of pottery?
What is the vocabulary of the practice?
What are the inputs to create it?
What are the tools & techniques used?
What is a day in the life of a pottery artist?
How is a professional different from a hobbyist?
Why do they do it?
After hours of reading, watching videos, and taking notes I had an understanding of every step of the process, every common tool, and a list of pain points.
Imagine you’re a professional pottery artist selling a teapot, advertising it with precise dimensions. Your customers expect their orders to match those promises. So, how do you ensure that each handcrafted teapot aligns with the original specifications?
Choosing a Pain Point
The Traditional Solution
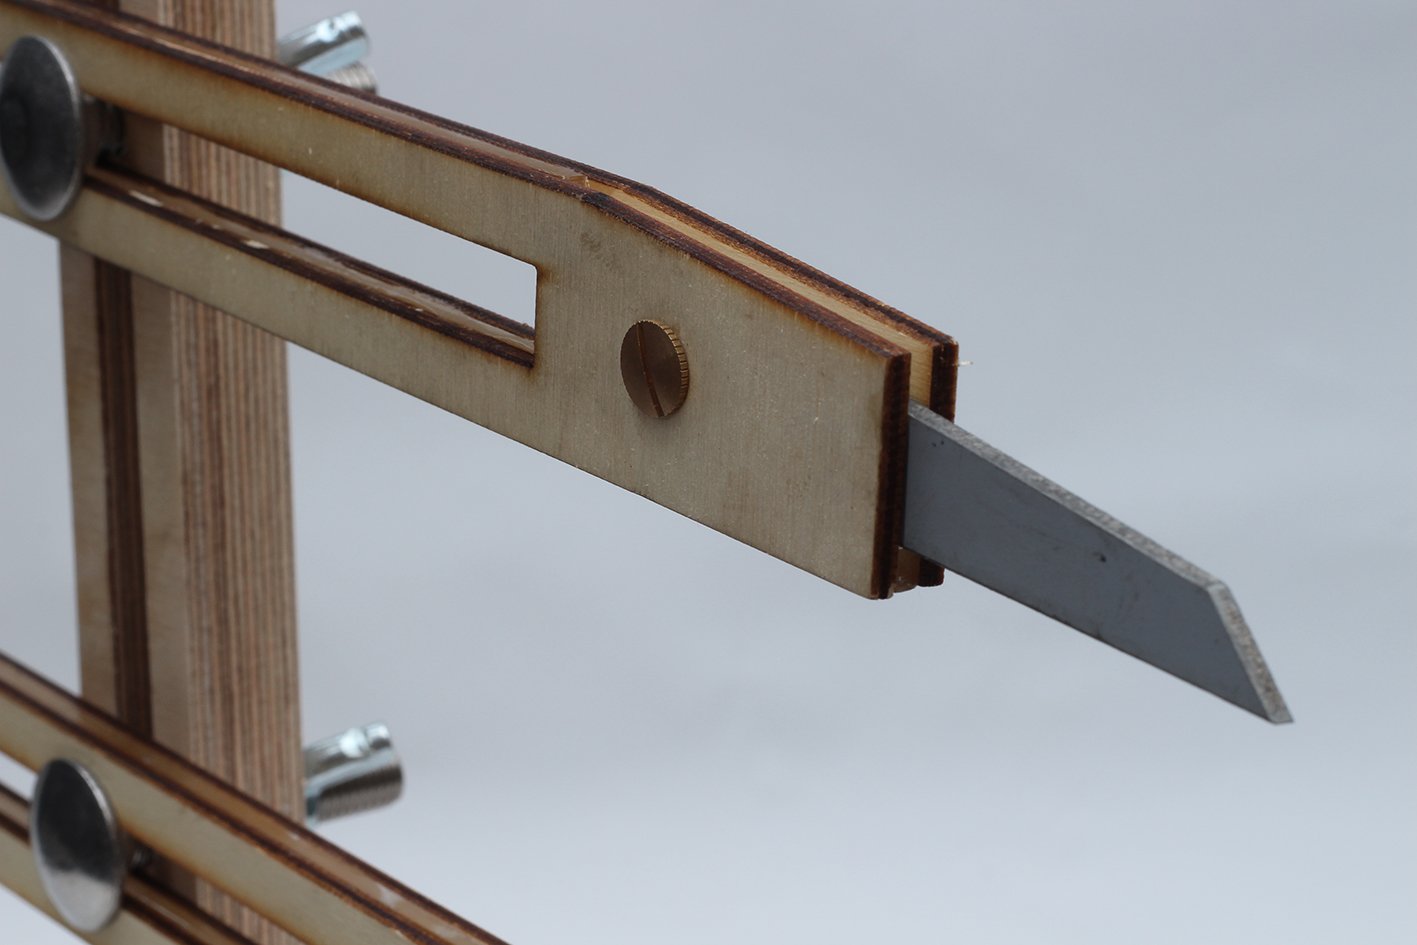
One of the most common tools for measuring clay during the throwing process is called the Throwing Gauge, which offers two reference points.
What’s the problem? Well the throwing gauge is limited to only two points of reference that invade the work space and risk damaging the clay.
Modern Tech Opportunity
My experience in the past with laser levels in the world of construction inspired me to incorporate that technology into a modern version of the throwing gauge.
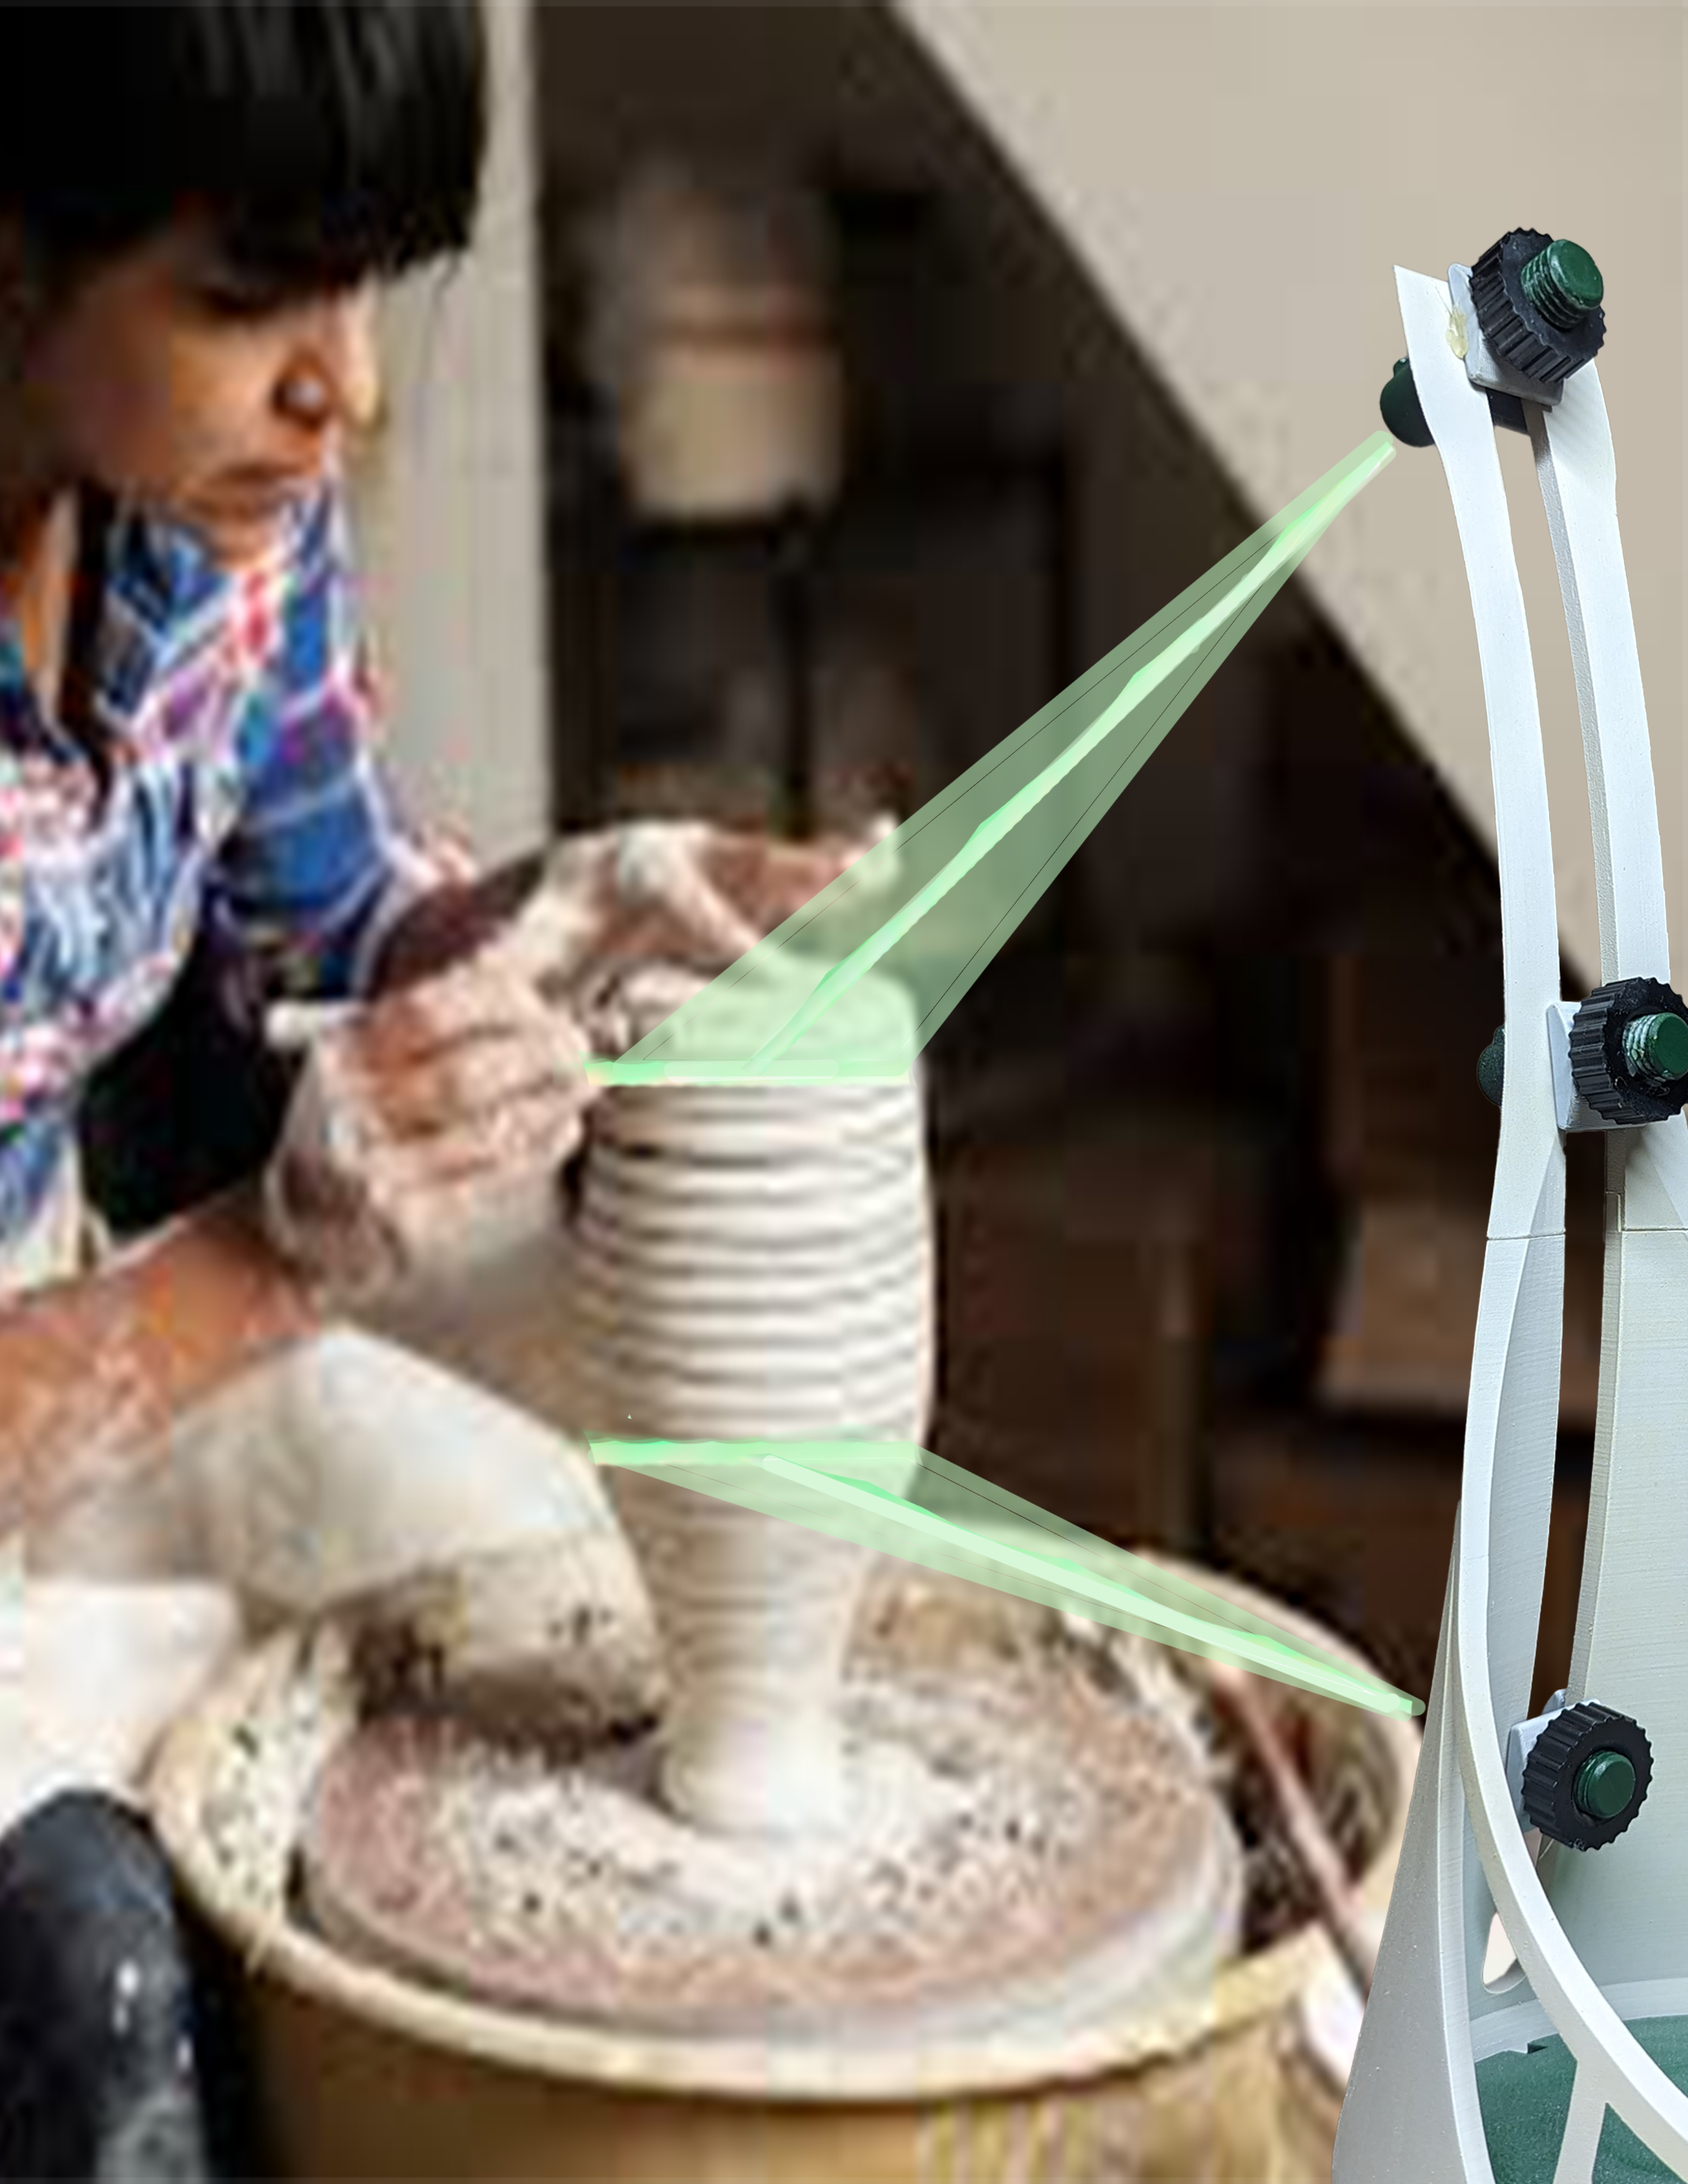
Using a laser to mark desired measurements on the pottery wheel would offer an unobtrusive, highly visible mark that could be cast from a distance outside the direct workspace.
The original product conception
Using a form that was quite similar to the traditional throwing gauge, I would mount lasers to a vertically standing frame that allowed horizontally cast lasers to be adjusted to the desired measurements.
Sketch Ideation
Sketching various ideas eventually led to a more organic form that I felt would represent the pottery the product would be measuring.
Gen. 1 Clay Beam
CAD
Physical Model
Rendering
Now you might be thinking, “Geez that presentation moved fast.”
You’re right, and that’s because Generation 1 did not fulfil the needs that I felt it should have.
So it was time for generation 2 of the Clay Beam.
Issues to Address
Leveling the Gen. 1 model was inefficient and doubling up levels was ugly
Adjusting laser height and securing lasers was overcomplicated and inefficient
Lasers that cast only horizontally which limited the products potential
The form-yes, I liked it, and yes, it reminded me of pottery. However, it was oversized, overly complicated, difficult to manufacture, and did not resemble a tool.
It was too artistic and needed a revamp
Gen. 2 Clay Beam
In contemplating design improvements, I discovered two essential components. The bullseye bubble level, and the crosshair laser. Both of these would be crucial in creating a more effective design solution.
The idea for the Clay Beam’s second rendition was hastily drawn in a well aged sketchbook.
Ideas arise and you have to catch them while you can.
CAD
From the simple sketch above I went to Solid Works to create a digital model of the Clay Beam in preparation for rendering.
So How Does it work?
Imagine you want to make a pot with 4 specific measurements like the one pictured to the right.
Well the Clay Beam can help.
The first step in the process will be leveling the Clay Beam on a surface near the pottery wheel with a clear line of sight.
To level the Clay Beam, you must adjust the feet by turning left to lower and right to raise, until the bubble of the level is centered.
Now that the Clay Beam is level with the pottery wheel you can toggle on one of the lasers using the switch located on the back side. This will engage a single crosshair laser that can be exemplified below.
Now adjust the laser height by loosening the knob of the desired laser body and moving it to the desired height.
With the proper height established, swivel the laser body to adjust the position of the vertical laser.
With the first laser body set to the desired height and width, repeat the same steps to set the second laser body.
Now you have all four measurements marked and are ready to throw clay with precision.
and that is the Clay BEam
The Clay Beam is the only product of it’s kind and for that reason it is a design that I return to when times allows.
The next steps are to revamp the aesthetic with manufacturing considerations, test the product with users to gain input, add a foot pedal to control lasers, and make this a real product if possible.
Stay tuned for the Clay Beam 3.0.


